Art work, Artistic Creations, artistic designs, Creative madness, DIY, Wall decor

DIY Fairy on Wall : Fairyland Wall Art 3

PicsArt_08-14-08.25.07

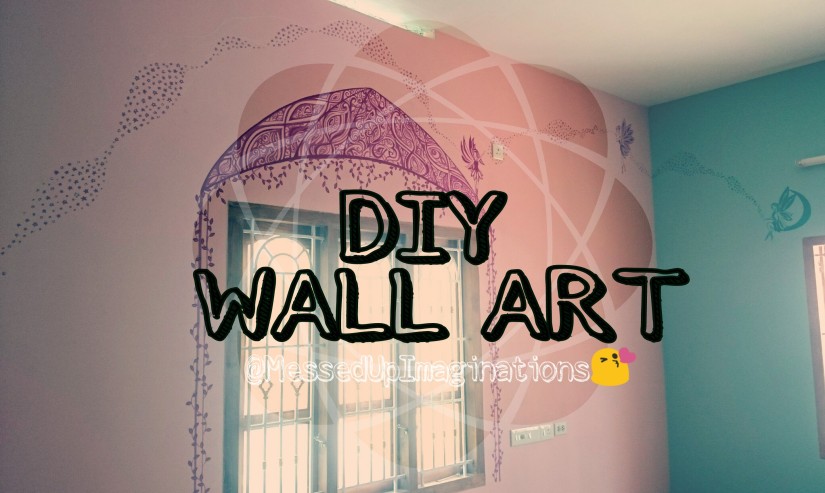
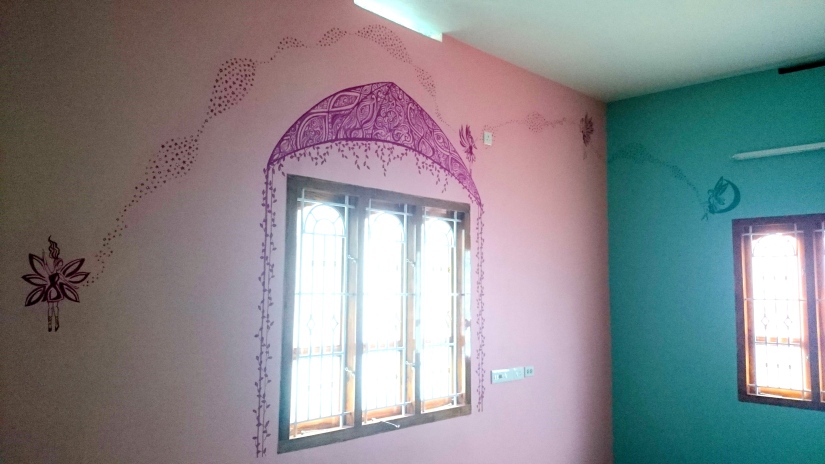
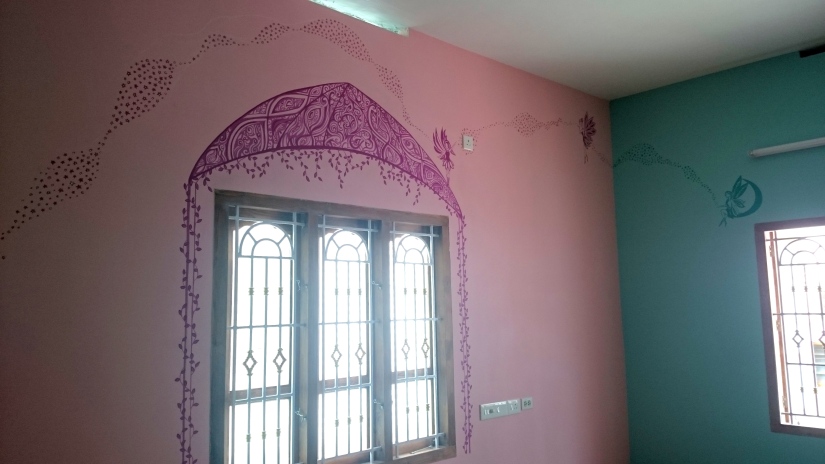
Drawing & coloring is relaxation for some and so is it for me and I am back with a new fairy-land wall art this time again. I know you must be thinking, “Where does she get the walls to paint her heart out”? Well! This time it’s my Uncle’s home. My Uncle got very impressed with my wall art and offered me his room wall for another fairyland adventure.

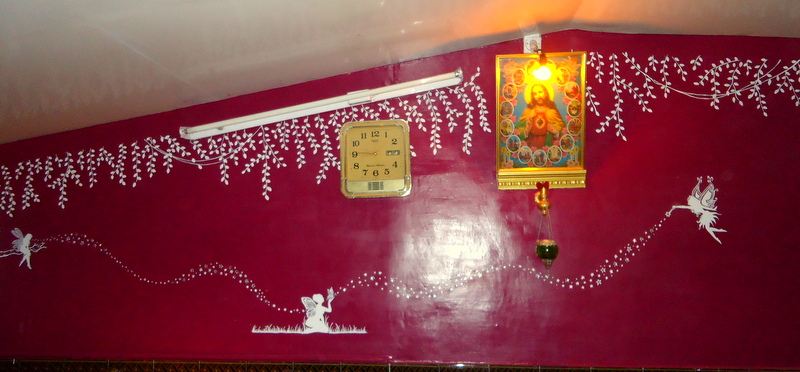
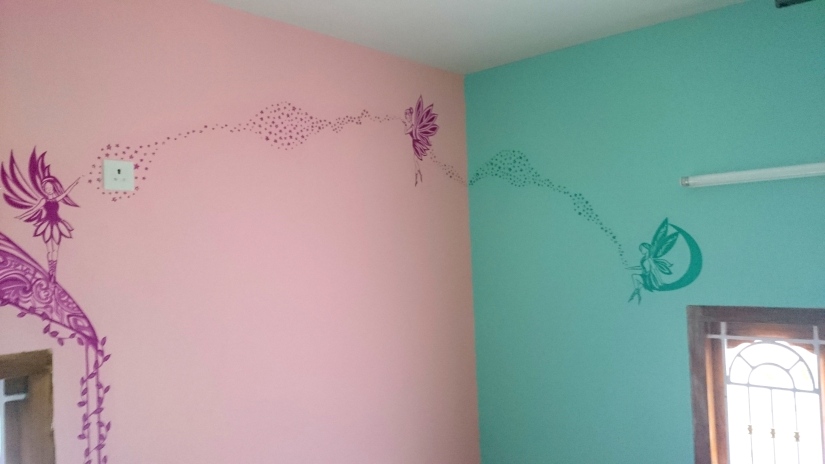
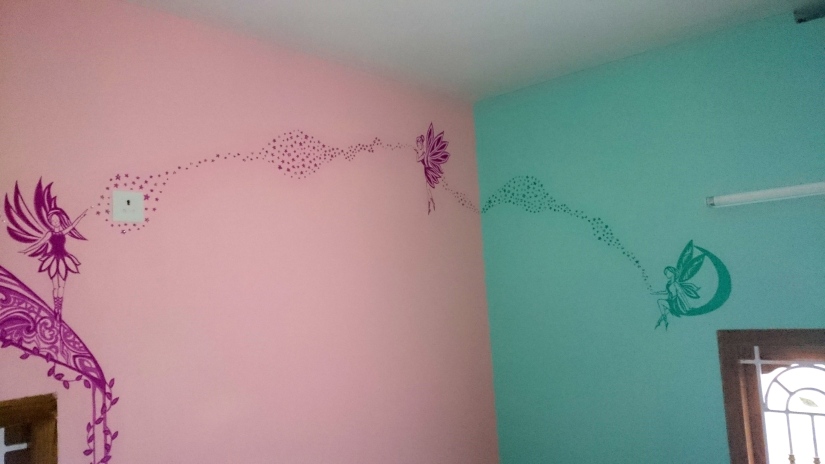
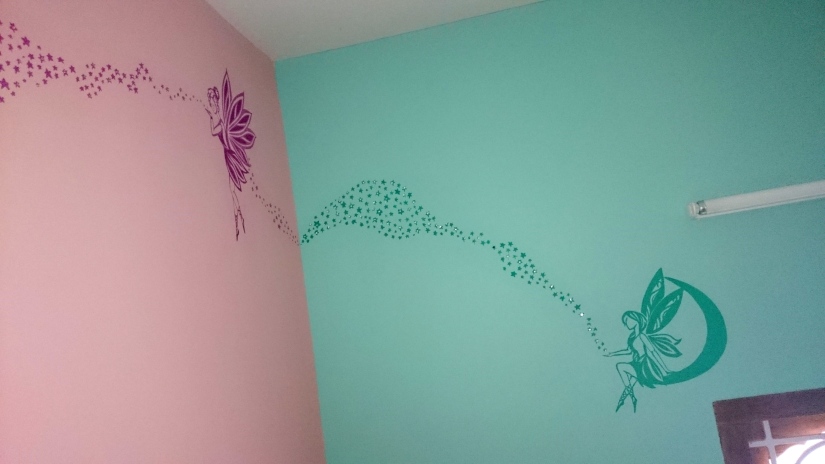
The room walls where covered in two different colors, one a light pink & the other a light green. So, we took a darker shade of the background wall color to unleash our art on both the walls. Taking up of the darker shade gave the wall art an self-design kind of look.

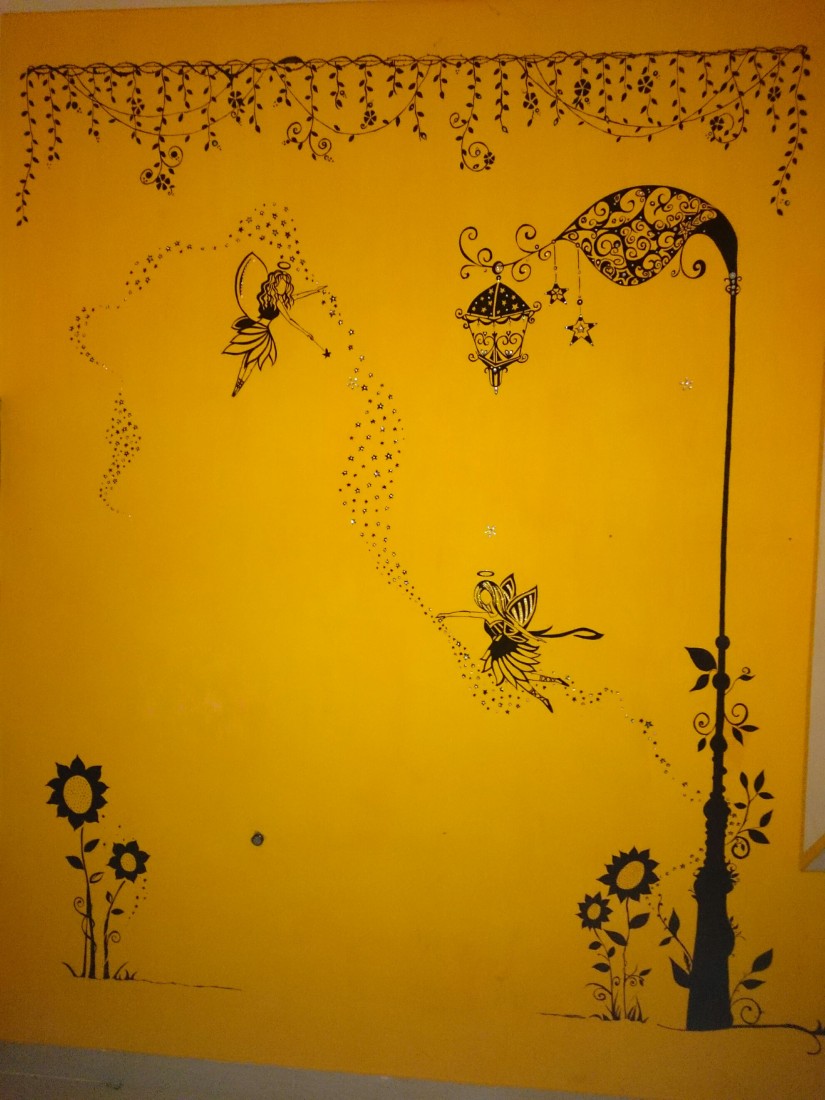
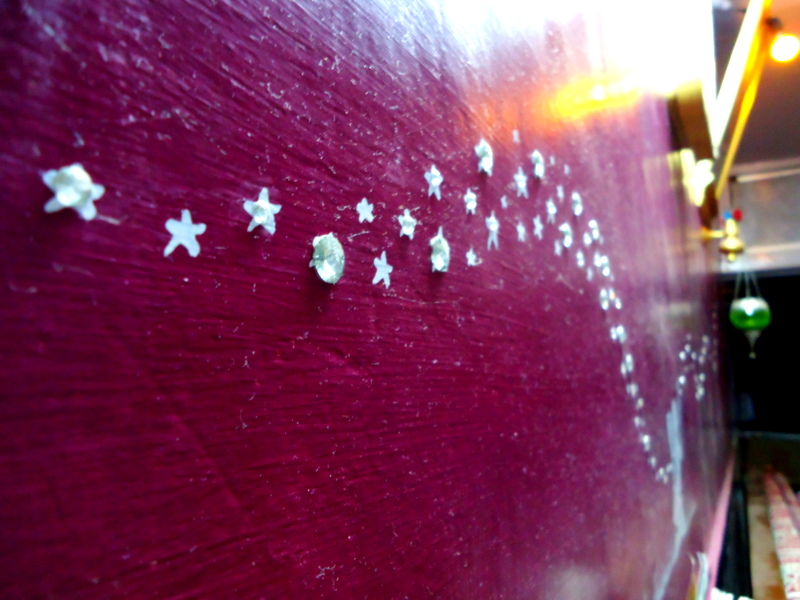
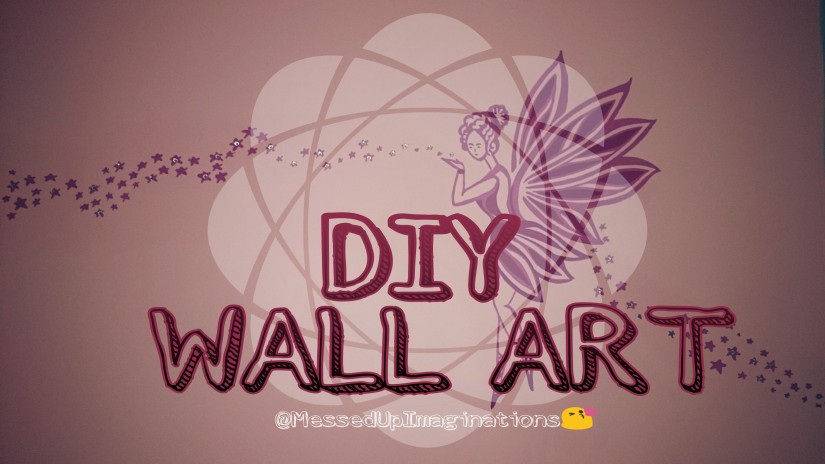
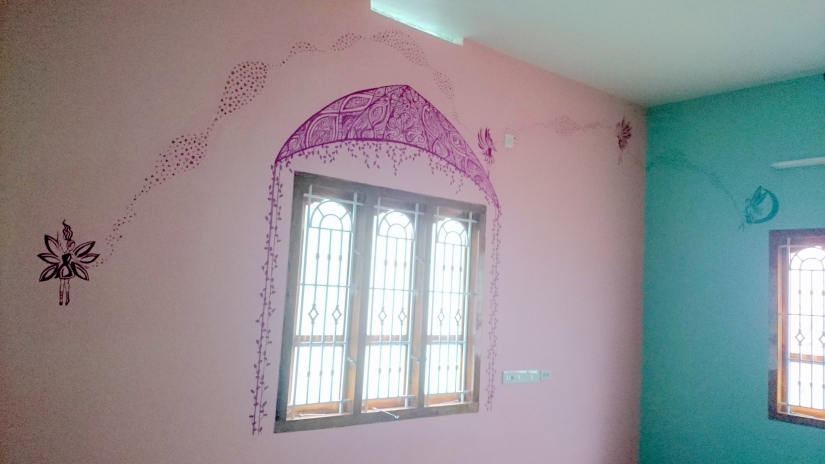
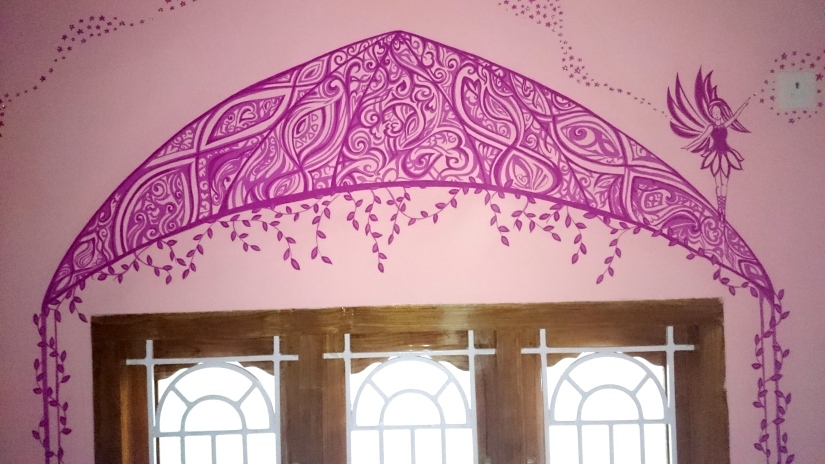
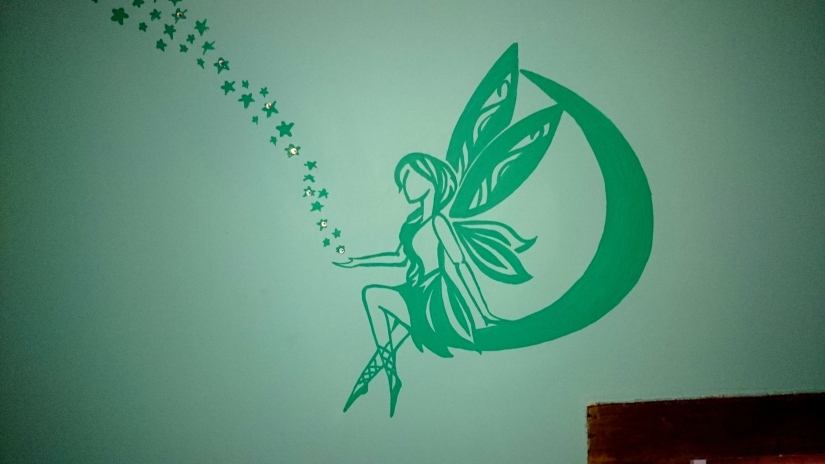
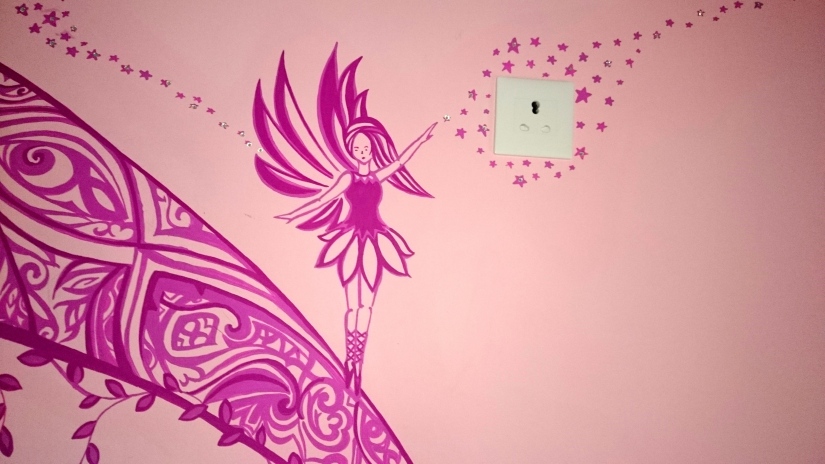
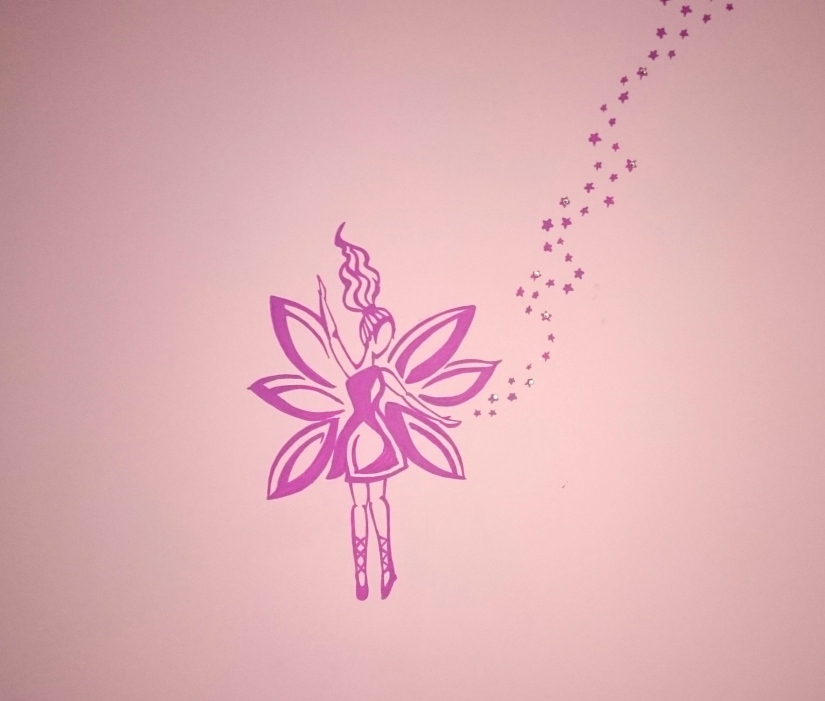
The fairyland includes a big gate which we drew in the form of a dome over a window and four fairies each connected with pixie dust. The idea of the pixie dust with rhinestones make it a fabulous piece of work and you should definitely use it in your wall arts.

PicsArt_08-14-08.09.46

Required Materials:

  1. Chalk pieces for outlining you art on the walls ( Don’t use pencils as make the walls dirtier and increases you difficulties)
  2. Water-based Maroon & Green Paints (The background paint of the wall is also water-based).
  3. Brushes
  4. Rhinestones
  5. White Gum
  6. A brilliant idea and some patience as always.

First, I should apologize because I couldn’t provide the step by step tutorial of the wall art again but the final fairyland wall art is available.

DSC_1336DSC_0851DSC_1392DSC_1369DSC_1389DSC_1372DSC_1371DSC_1365DSC_1362DSC_1361DSC_1355DSC_0567

Hope you got some inspiration and ideas from the fairyland. You can check out my previous fairyland wall ventures here and here,

Enjoy!!

Art work, Artistic Creations, artistic designs, Creative madness, DIY, Wall decor

Fairy Land DIY Wall Decor/Art


PicsArt_05-17-09.10.09

A year-round workaholic deserves a well-enjoyed break and I go by this principle. Last month I had this great opportunity to relax, enjoy and cherish an awesome vacation which gave me a fabulous chance to work out my new wall art idea in my vacation home. So, I am back with one of my most favorite DIY – a fairy land wall art and this time its a different fairy land with fairies, fairy dust, lamp post and sunflowers. The fairy land idea rooted from my previous wall decor art fairy land with some creative changes but with the same base idea.

Research says that different colors can affect the mood of people sharply and so we implemented the lessons learnt from our previous wall art venture here and chose a brilliant colored background and dark shade paint for the designs as we were short on lightings in the room. The amber(yellowish-orange) color that we used for the background radiates happiness, confidence and energy. But, as too much of yellow based colors can be distressing we painted just one wall with amber and the others with white and amber as border.

To start with you will need either oil paint or emulsion paint (water-based), brushes, white rhinestones/gemstones, white glue (Elmer/Fevicol), a brilliant idea and some determination. Before starting, we outlined a general idea of the fairy land and took out some printouts of the silhouettes of the main elements of the art like lamp-post, fairies etc. The fairy land comprises of two fairies flying near a lamp-post with fairy dust and the top adorned with leafs and flowers whereas the bottom is graced with sunflowers. The finished work can be seen below.

PicsArt_05-17-08.52.18
DIY Fairy Land Wall Decor

All the designs were hand-drawn on the wall with a chalk-piece as the sizes of the art on the wall are bigger than A4 size.

The lamp-post is a combination of 2 lamp-post from the below images.

After finishing the wall decor, we pasted some silver rhinestones on the fairy dust.  I preferred the silver gemstones compared to the colored ones as they reflect light better and shine from different angles but nonetheless there are infinite possibilities that you can try. The final art was just awesome and I believe you would too agree with me.

Thank you for visiting us and feel free to take inspiration from the art. If you like the work, please please pin the images.

Happy Reading!!!!:)

Art work, artistic designs, Wall decor

My Artistic Creations : Wall Decor 1

I love drawing and painting. I sometimes even think that instead of being an engineer I must have chosen an artistic profession. But nonetheless no one is stopping me from painting my own house walls. I along with my #awesome sister painted a fairyland in our wall. Since we did it a long time back its difficult to give a step wise tutorial, but I will try to provide you with the overall idea though.

We used a deep shade of magenta Asian oil paint for the background and white oil paint for the designs. After painting the wall with two coats of the background paint, we left it to dry for two days. Then we traced out the top design of leaves with a white chalk and then painted it with a thin haired paint brush.

This is the finished wall art… ( sorry for the flash from the camera)

DSC01304

Artwork1

For the fairies, we took printouts of each fairy in silhouettes separately and cut of the design along the outline. Then with the help of a pen we traced out the outlines of the fairy on the wall and then painted it.

1c1cc3e5015e22e34204e84989723442 884c45ac749e44e9056c71b32917fd47 tree-Godess-x-copy-1024x1024

We used a pen to trace the designs because the pencil traces were not visible on the wall as the background color was very dark.

DSC01368 DSC01371 DSC01372

Then we took some inspiration from fairy dust and painted them between the fairies and we even glued some plastic silver sequins to the fairy dust.

DSC01376 DSC01377

Points to Note :

1. If you are using a dark background make sure that you have enough light settings in the room otherwise it makes your room dull. So if you don’t have enough lights, opt for a lighter shade in the background and a darker shade for the designs.

2. Please remember to make the leaves small, because bigger leaves may be easier to paint but believe me it looks very childish (I know it because I have tried it and ended up repainting the entire wall again).

Feel free to take inspirations from our work and you can even try new ideas. Any questions? Please feel free to ask, I will try my best to clarify your doubts as soon as possible. If you like it, then please please please give a like. It will be a great encouragement for us.

Thank you guys for your love. Hope you like it. I will soon update our other wall decor arts too.

Disclaimer : I do not own the fairy silhouette designs nor the sequins pic. But the ideas and the painted creation belongs solely to me and my sister.